4.3. Multimodality
4.3.1 Adding Images, Videos, and Audio
 |
Images and videos in #dariahTeach course materials are embedded using specific stylistic and formatting guidelines. Download this document for the full style guide with detailed instructions:
Download Visual Style Guide
Embedding Images
The procedure for embedding images and videos into a page has four steps:
Step 1. Upload image into the #dariahTeach database: In the editing window of your page, place your cursor approximately where you want to place your image, and click to select. Next, click the image icon in the upper toolbar, fourth icon from the right (Insert/edit image).Step 2. Choose the right image settings: You will now see the option to ‘Find or Upload an image’. Click and upload from your computer or select an image from the #dariahTeach database. Make sure to name the image and select the right licencing. Next, select the tab ‘Appearance’ in the upper toolbar. Use the following settings:
|
|
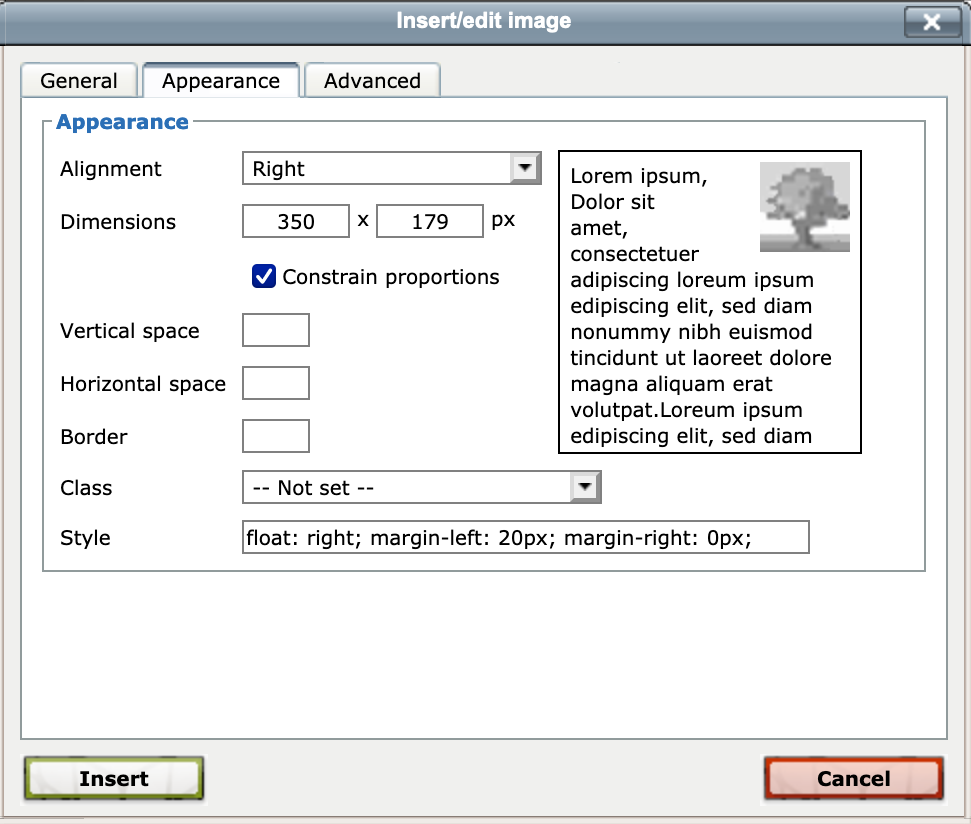
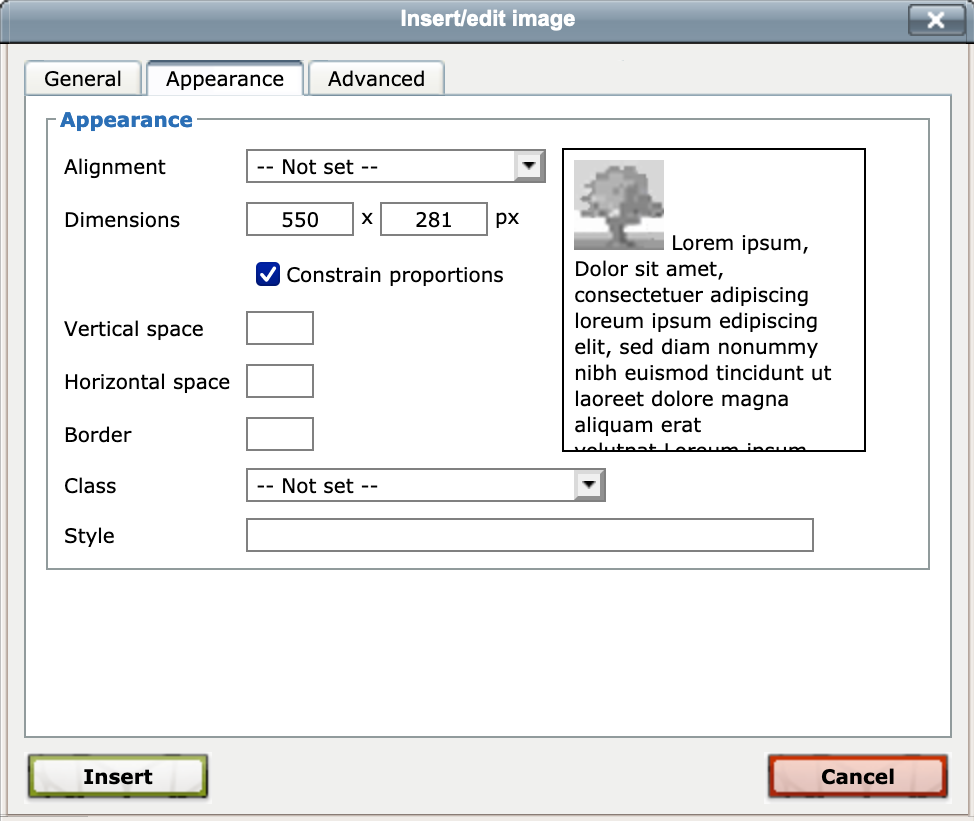
Step 3. Select URL from HTML Open the HTML editor (click the <> icon) Find the image source URL, it will look like this: Copy this url in a text editor
Step 4. Upload image in table and add caption Copy the following code and insert your image url, correct sizing and the caption Right aligned (edit the sections in bold): Copy the edited code and insert in the HTML editor. Make sure that the code is pasted where the image should appear.
Adding videos
To embed videos in a #dariahTeach page, the video must first be uploaded on YouTube.
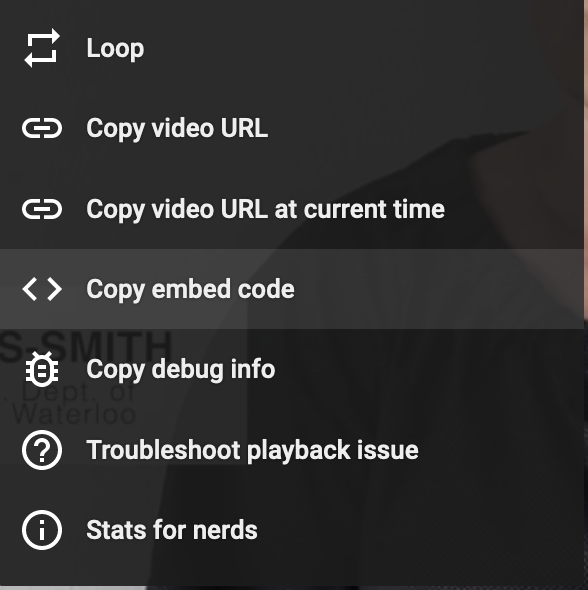 |
Step 1. Once uploaded, YouTube videos have an ‘embed URL’ that is accessible by right-clicking on the video:
Step 2. Copy this code and insert in the following HTML code (edit and replace sections in bold)
<table border="0" align="center">
<tbody>
<tr>
<td><iframe src="https://www.youtube.com/embed/7NL2__r20co?list=PL77mHK9JuenNJ3hJTB4YpJvPhb-xDp0qD" allow="accelerometer; autoplay; encrypted-media; gyroscope; picture-in-picture" allowfullscreen="" width="640" height="385" frameborder="0"></iframe></td>
</tr>
<tr>
<td style="text-align: center;"><em><span style="font-size: small;">Prof. Susan Schreibman explaining the core concepts behind the IGNITE curriculum at the 2020 IGNITE Digital Roundtables. (<a href="https://www.youtube.com/embed/7NL2__r20co?list=PL77mHK9JuenNJ3hJTB4YpJvPhb-xDp0qD" target="_blank">YouTube link</a>)</span></em></td>
</tr>
</tbody>
</table>
Step 3. Copy your code and embed into the HTML editor.
Adding audio
Step 1. Upload image into the #dariahTeach database:
In the editing window of your page, place your cursor approximately where you want to place your audiofile, and click to select.
Next, click the media file icon in the upper toolbar, third icon from the right (Insert Moodle media).
Step 2. Select URL from HTML:
Open the HTML editor (click the <> icon). Find the audio source URL, copy the code and paste in a text editor.
Step 3. Add sound icon and add caption:
Download the following code and insert your audio url, change the caption:
HTML Code for Audio
Copy the edited code and insert in the HTML editor. Make sure that the code is pasted where the image should appear.
It should look like this: