

3.3 Reflectance Transformation Imaging
3.3.2 RTI Capturing
 |
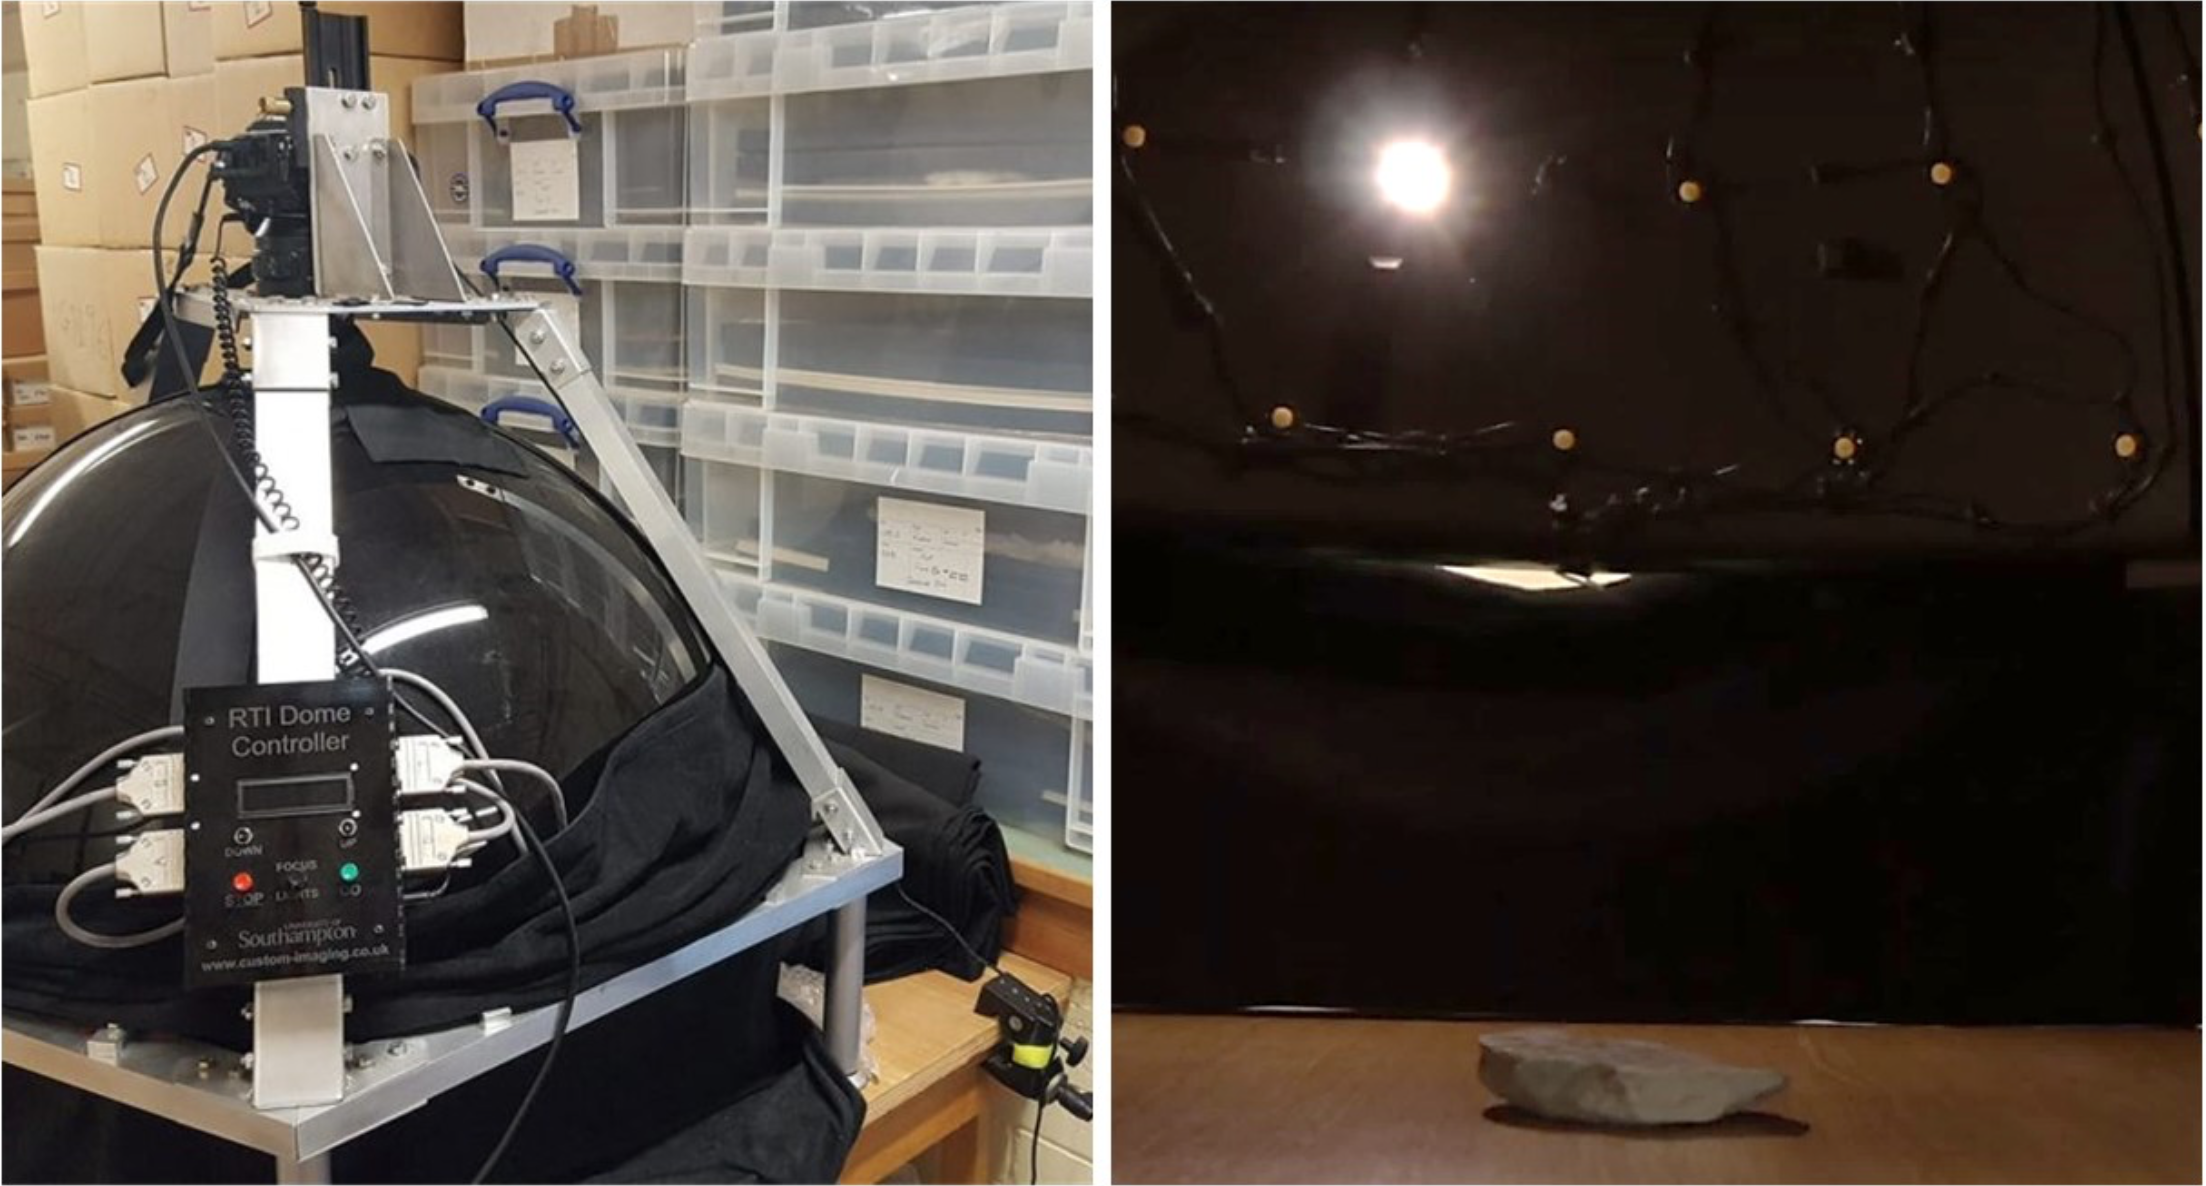
Both methods are based on the same principle. The camera and the photographed object are at a fixed position, while the only element that changes between images is the position of light. An image of the photographed object is taken for each light source, which due to the incident light angle produces high contrasts and enhances the appearance of surface details.
 |
|
RTI Dome developed by the University of Southhampton, UK (Kirk Martinez, Custom Imaging) |
In the Dome RTI method, lights are positioned on a dome at known locations. The camera mounted at a top is connected with a computer (via a cable or wirelessly) which runs a software to take the pictures while alternating the lights of the dome in each of these photos. These images will then be processed in a dedicated RTI software to allow the virtual and interactive relighting of the object. One potential disadvantage, depending on the size of the dome, is that it can only fit artefacts of certain sizes. However, recent developments in computer engineering have enabled the production of portable and even foldable domes that can accommodate different object sizes. Such Dome units are typically produced within university labs and well-funded projects are typically are not commercially available. They often cost several thousands and thus make more difficult the adoption of the method by under-resourced institutions and/or for educational purposes. In recent years, the DIY movement has also contributed to the development and broader adoption of the method, since 3D printed domes and individually sources components (e.g. LED lights, arduino controllers etc.) can significantly reduce the costs involved.
 |
|
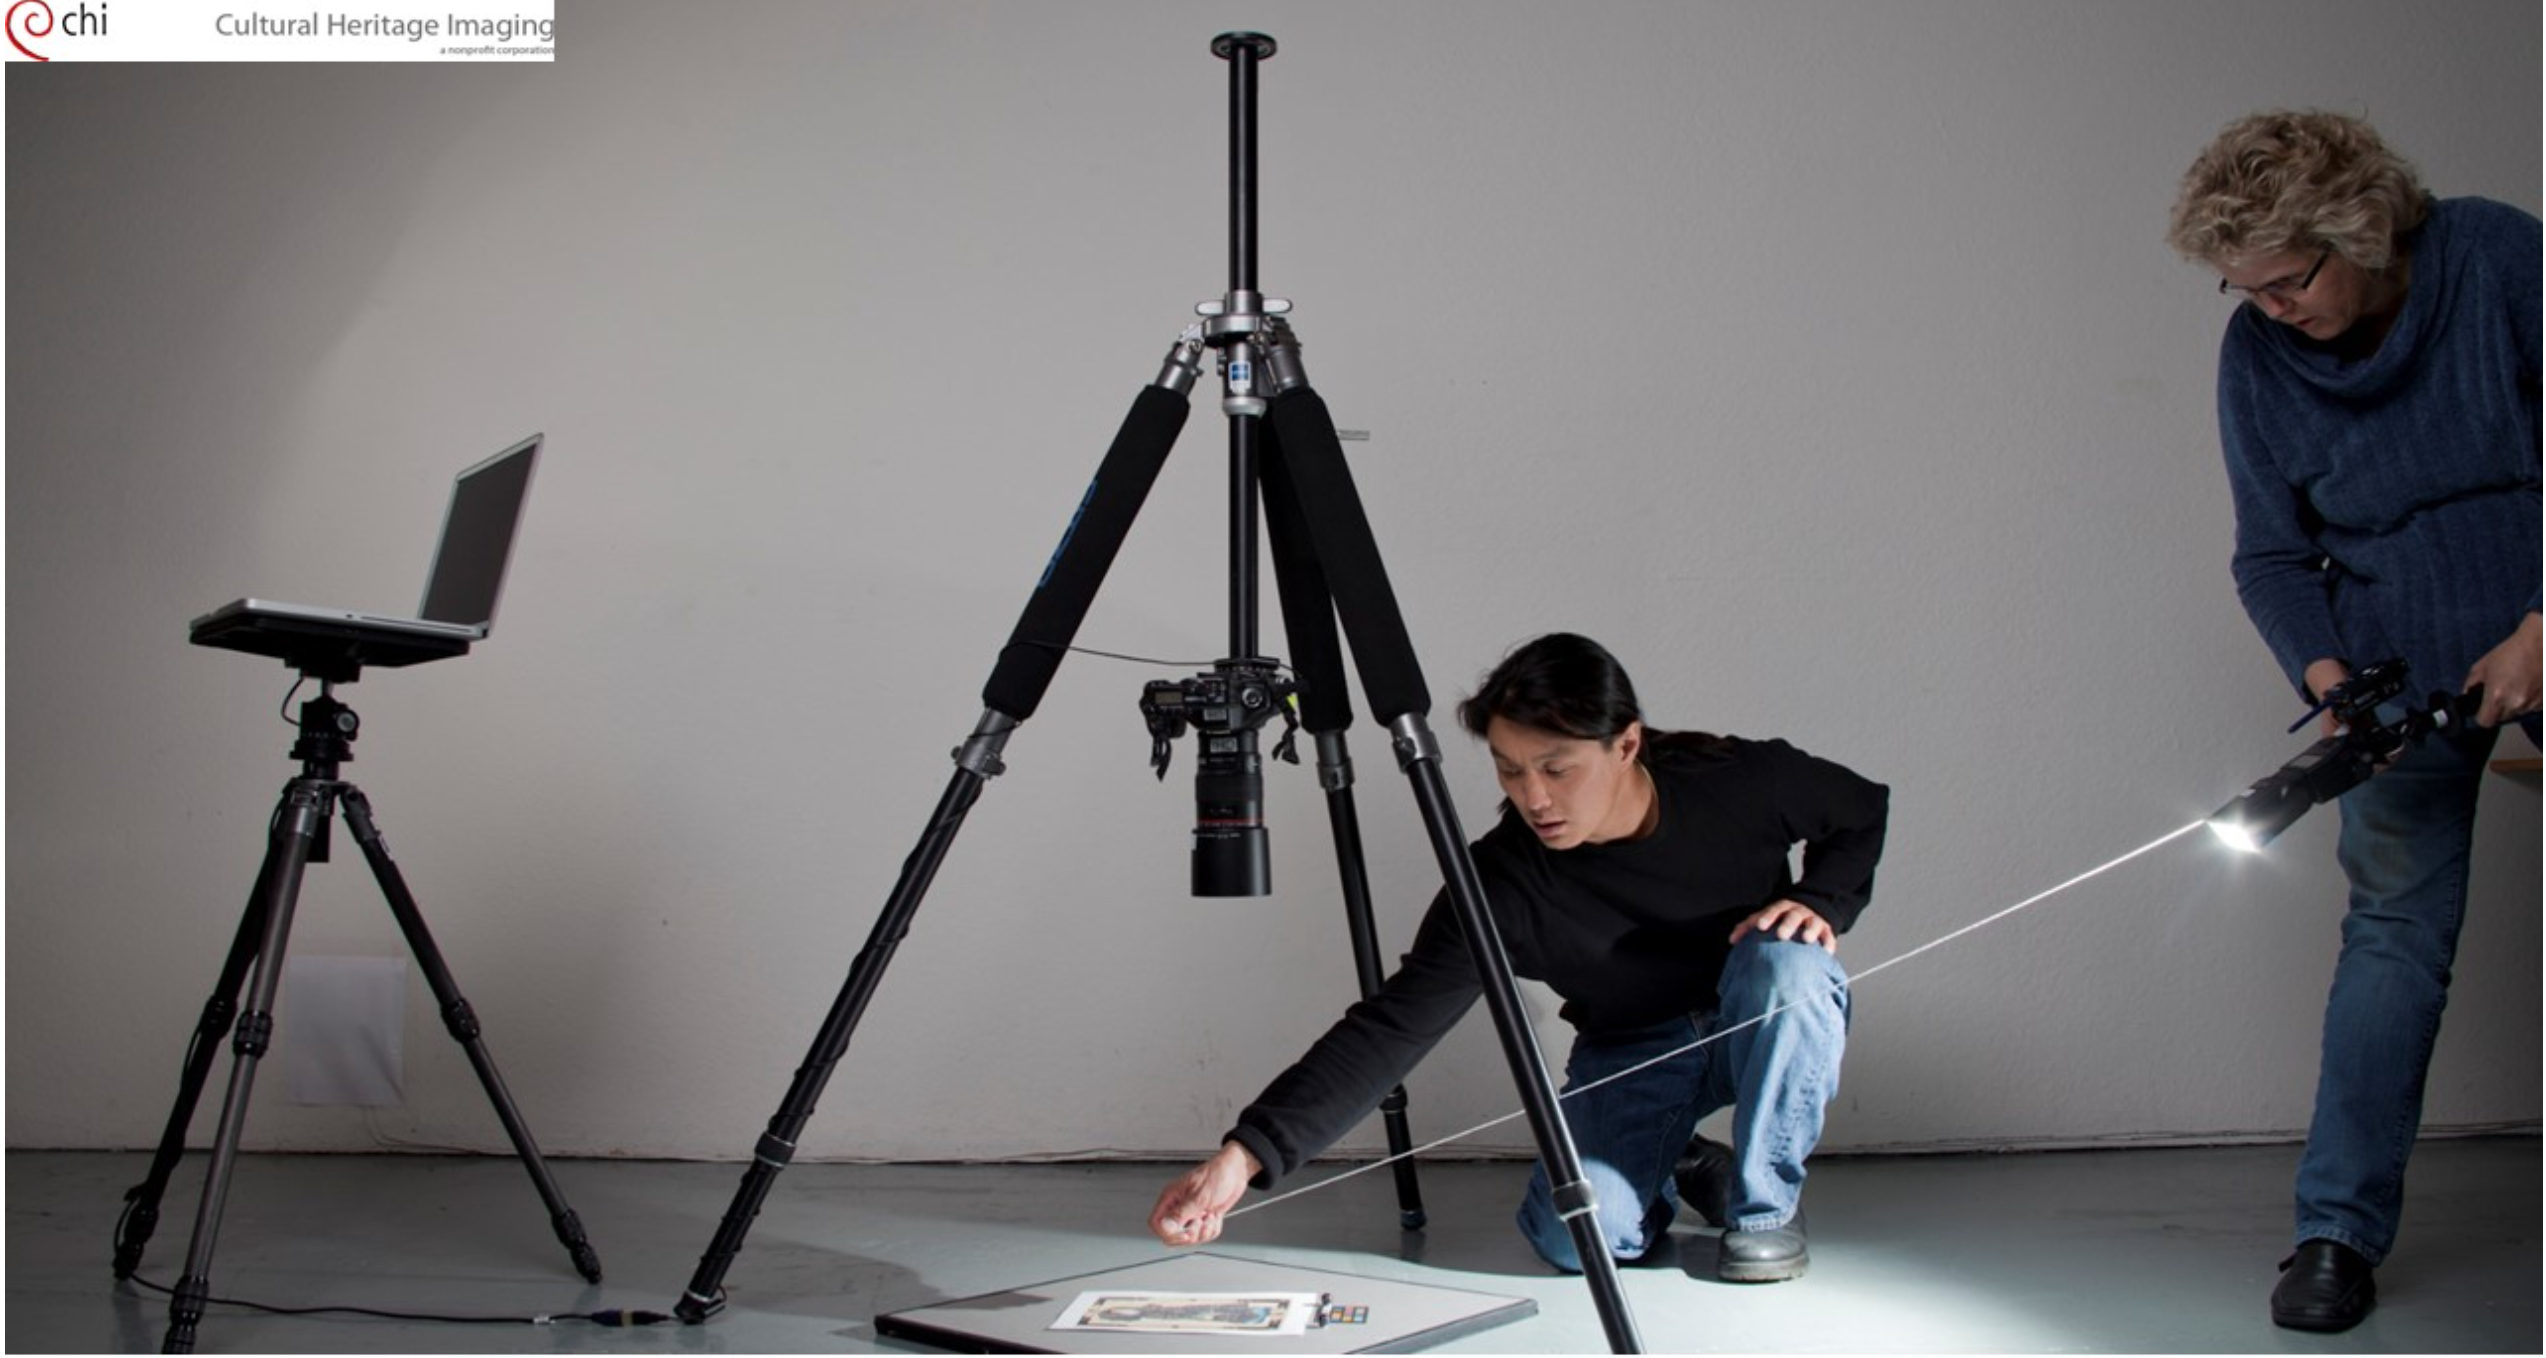
Setup for Highlight RTI (Carla Schroer, Cultural Heritage Imaging) |
Professionally-designed domes come at a high cost, and they are also limiting when it comes to their portability and the artefact sizes that can accommodate. For this reason, Cultural Heritage Imaging, a not-for-profit organisation based in California, USA, developed the Highlight RTI method, which can be applied to any object, structure, or surface and has a lower cost since a dome is not involved. Highlight RTI requires a camera at a fixed position (via a tripod) and a handheld, portable light source (e.g. a camera flash, a desk lamp, a torch etc., depending on the characteristics and peculiarities of the object photographed).
 |
|
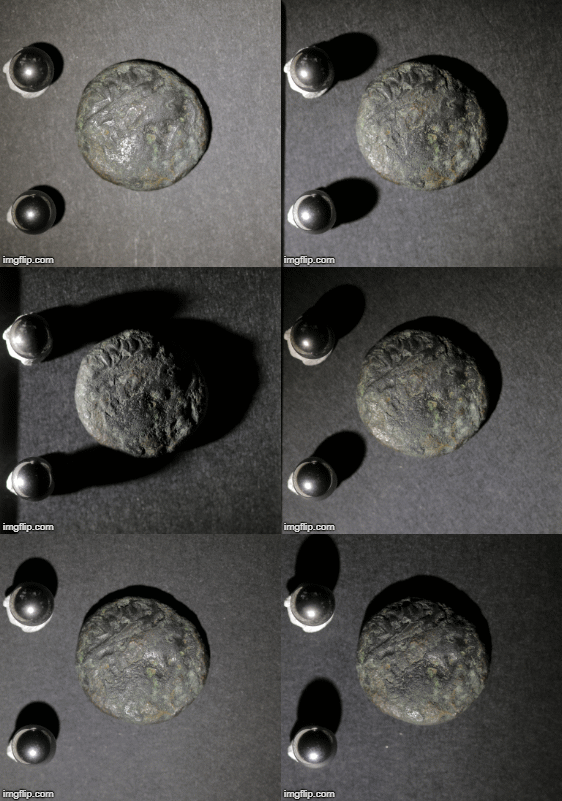
RTI Capturing Coin |
The image on the left shows a coin being photographed using the RTI highlight method. The light source used is a torch whereas the location of the light is captured by two reflective spheres positioned next to the artefact. The reflective spot on the spheres is used by the processing software to locate the position of the light in each picture. In the following presentation, you will learn more about the equipment needed and the best practice for capturing Highlight RTI datasets. In the following lesson, you will also have the opportunity to use pre-captured images to process a dataset.
| Instructional Tutorial on Dataset Capturing (YouTube) |
References
DIY RTI Domes
- Kinsman, T. 2016. An Easy To Build Reflectance Transformation Imaging (RTI) System. The Journal of Biocommunication 40(1). https://firstmonday.org/ojs/index.php/jbc/article/view/6625/5594
- Pawlowicz, L. 2016. Affordable Reflectance Transformation Imaging Dome. https://hackaday.io/project/11951-affordable-reflectance-transformation-imaging-dome
- Affordable Reflectance Transformation Imaging Dome. (2016) https://www.youtube.com/watch?v=CcKJVhKGD9A
- Zaman, T. 2015. Reflectance Transformation Imaging (RTI) Dome. http://www.timzaman.nl/rti-dome
Highlight RTI Capturing
- Cultural Heritage Imaging 2013. Reflectance Transformation Imaging: Guide to Highlight Image Capture. Version 2.0. http://culturalheritageimaging.org/What_We_Offer/Downloads/RTI_Hlt_Capture_Guide_v2_0.pdf
- Cultural Heritage Imaging 2014. Reflectance Transformation Imaging: Glossary of Photographic and Technical Terms for RTI. http://culturalheritageimaging.org/What_We_Offer/Downloads/Capture/CHI-RTI-Glossary_v1.pdf
Highlight RTI Videos
- Cultural Heritage Imaging 2013. Light Positioning for Vertical RTI Data Capture. https://vimeo.com/68811240
- Cultural Heritage Imaging 2011. Performing a Reflectance Transformation Imaging (RTI) Data Capture. https://vimeo.com/23008695