3.3 Reflectance Transformation Imaging
3.3.5 RTI Viewing
Firstly, you have to download the RTI Viewer. There are MAC and Windows (32/64bit) versions available on the Cultural Heritage Imaging Website. If you haven't yet managed to complete an RTI file yourself you can use the ptm file produced as part of the RTI Processing lesson.
|
RTI Viewer (click to enlarge the figure) |
The Interface
|
RTI Control Panel (click to enlarge the figure) |
Spend some time to experiment with the interface. Start with the light controller, which allows you to manipulate the display of light on the viewing panel. Notice that the green controller has a bright spot. When this is in the middle, light comes from above the object (or in front if is is a vertical surface). If you drag the spot to the right edge, you will see that the light cast on the object also changes; as you move from the centre to the edge, you will notice that the effect on the object is similar to casting light from a very low angle. When you are at the edge of the controller, this means that light comes from almost 0 degrees angle from that direction. See for example how the object is displayed in the image below, where light is cast from a very low top, bottom, left, and right angle.
Using the control panel you can also change the zoom factor of the object (you can also do that using the scroll wheel of your mouse or zoom in/out function of your mouse pad), save snapshots of the current view, create bookmarks and also select a rendering mode. It is important to note here that depending on the fitting algorithm you used to create the RTI file (HSH or PTM), you will get a different list of rendering modes; a PTM file will provide you with ten options while an RTI file only with three. As mentioned in the previous lesson, it is advisable to produce both an RTI and PTM file since the fitting algorithms will render your object differently and thus give you additional information for the surface characteristics of the object.
|
RTI Light Directions (click to enlarge the figure) |
Rendering Modes
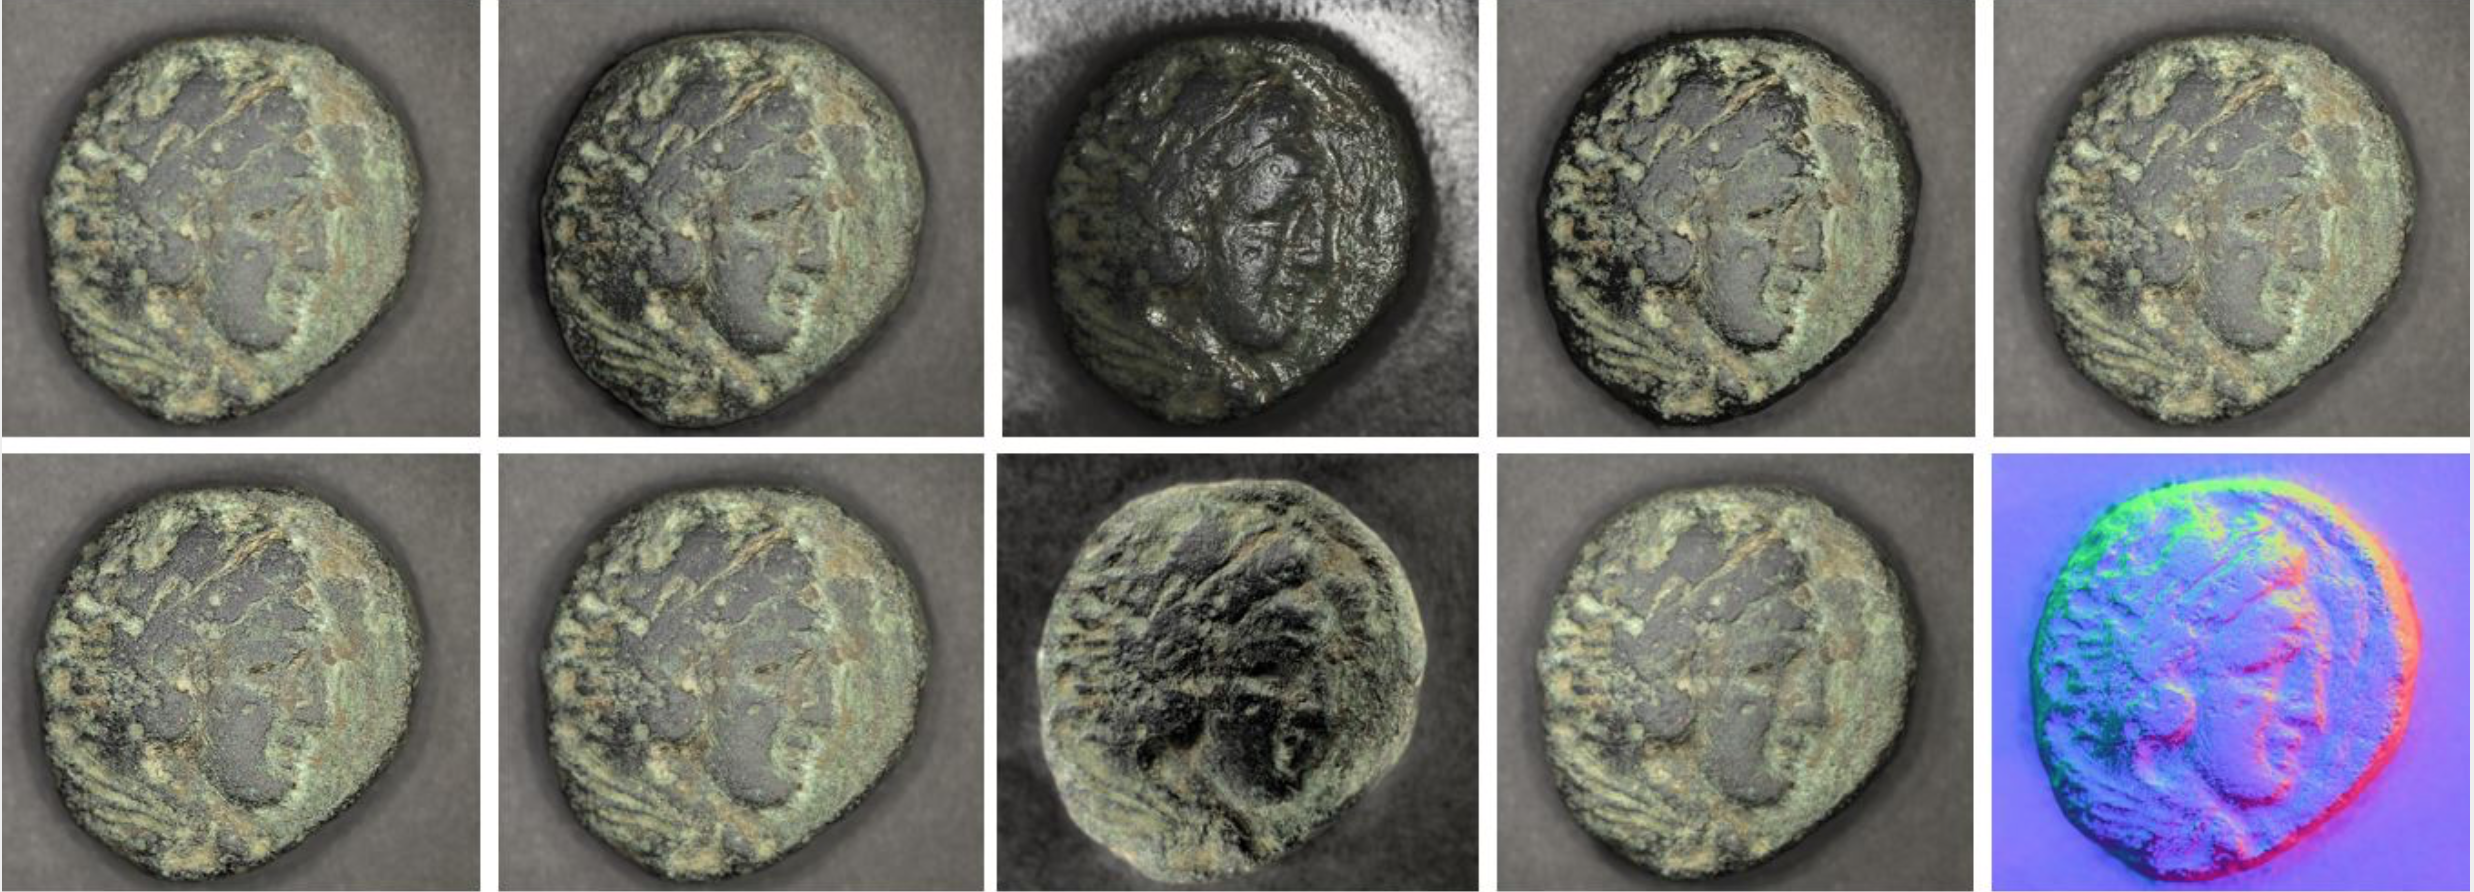
In the RTI Viewer, it is not only the light direction that can be manipulated. Computational enhancements, called rendering modes, can further transform objects' reflectance properties. Since RTI does not only record colour information (contrary to ordinary images), but also shape information per pixel (normals), these algorithmic transformations can further manipulate objects' three-dimensional features, thus providing further enhancements of surface characteristics and subtle details. In the image below you can see ten different rendering modes (the PTM fitter was used for this RTI). Below, we will mention a few basic characteristics of each mode. It is out of the scope of this lesson to go through all these in great detail; however, the RTI Viewer guide listed under 'useful sources' provides a detailed account of each rendering mode and their parameters.- Default: This is the default view and no enhancements are applied to it.
- Diffuse Gain: This mode enhances the height and depth information on the object's surface
- Specular Enhancement: This mode separates the diffuse colour, specularity, and highlights of an objects' surface. Because of this, it also enhances surface shape characteristics.
- Normal Unsharp Masking: This mode enhances the objects' surface contrast
- Image Unsharp Masking: This mode enhances the objects' edge contrast
- Luminance Unsharp Masking: This mode amplifies objects' depth discontinuities
- Coefficient Unsharp Masking: This mode amplifies objects' reflectivity discontinuities
- Static Multi Light: This mode optimises objects' sharpness and brightness by combining different light angles
- Dynamic Multi Light: This mode is the same as the above, however, the effect can be dynamically changed by manipulating the position of the light source
- Normals Visualisation: This mode presents a false-colour rendering that displays the objects' surface orientation per pixel
Bookmarks
 |
|
Bookmark Screenshot (click to enlarge the figure) |
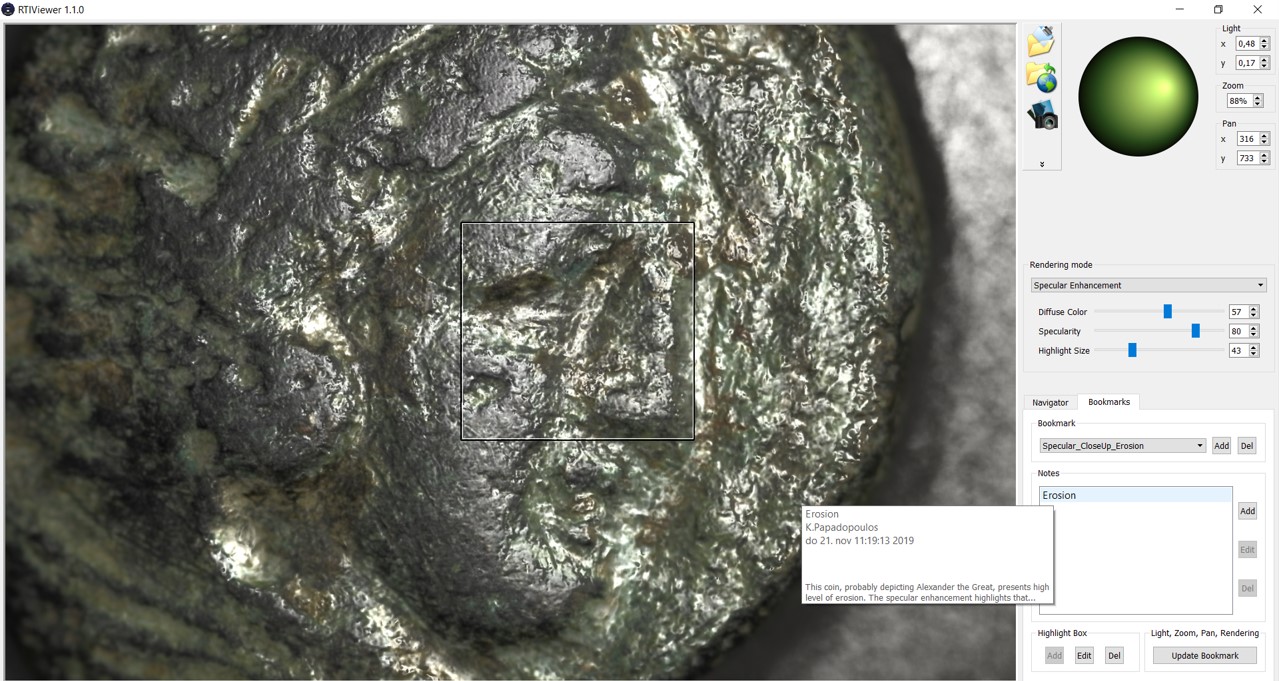
To create a bookmark, you first need to decide about the rendering mode, light position, and zoom factor. Once happy with the view (as this will become the default view of the bookmark), you can select 'Add' and type in the bookmark name. This needs to be a self-explicit name, so you or others who may get the file later can understand what this is about without having to get into all the bookmarks. You can then add one or more notes, where you can explain the content of the bookmark. In the image below, the note is about erosion on this side of the coin and can be retrieved by clicking or hovering over the title of the note. In addition, you can also 'add' a highlight box, in case you would like to direct the attention to a specific part of the object. In this case, the highlight box is in the area of the eye, cheek, and nose to highlight the area with the most erosion. Lastly, while you are working on a particular bookmark, you may decide to change the light, zoom factor, and rendering mode of the view. If you do that, do not forget to click 'update bookmark'.
Other RTI Viewers
The RTI Viewer presented here is a desktop viewer, which means that it can only be installed locally. Therefore, in order for somebody to get access to your RTI files, they will need to download/install the RTI Viewer and also get your RTI File. However, there is also the WebRTIViewer, an HTML5-WebGL viewer developed by the Visual Computing Lab in Italy, that allows the visualization of your image in a standard web page without the installation plugins (although the RTI files need to be placed in a local server). You can find more information on this here. In addition, there is the Visual Media Service, also developed by the Visual Computing Lab, that allows the online presentation of RTI files (as well as 3D models and high resolution images). Although this is not a repository, it enables researchers to publish and freely share visual data on the web. Regarding RTI files, you should note that the Visual Media Service only supports the relighting of the object in the default view and not the other rendering modes. Once the RTI files have been uploaded to the service, it can be either explored on the site or embedded into other pages using an iframe.
References
- Cultural Heritage Imaging and Visual Computing Lab, ISTI - Italian National Research Council 2013. Guide to RTIViewer v1.1. http://culturalheritageimaging.org/What_We_Offer/Downloads/rtiviewer/RTIViewer_Guide_v1_1.pdf


